Micro sans fil Peavey PV1 U1 HH
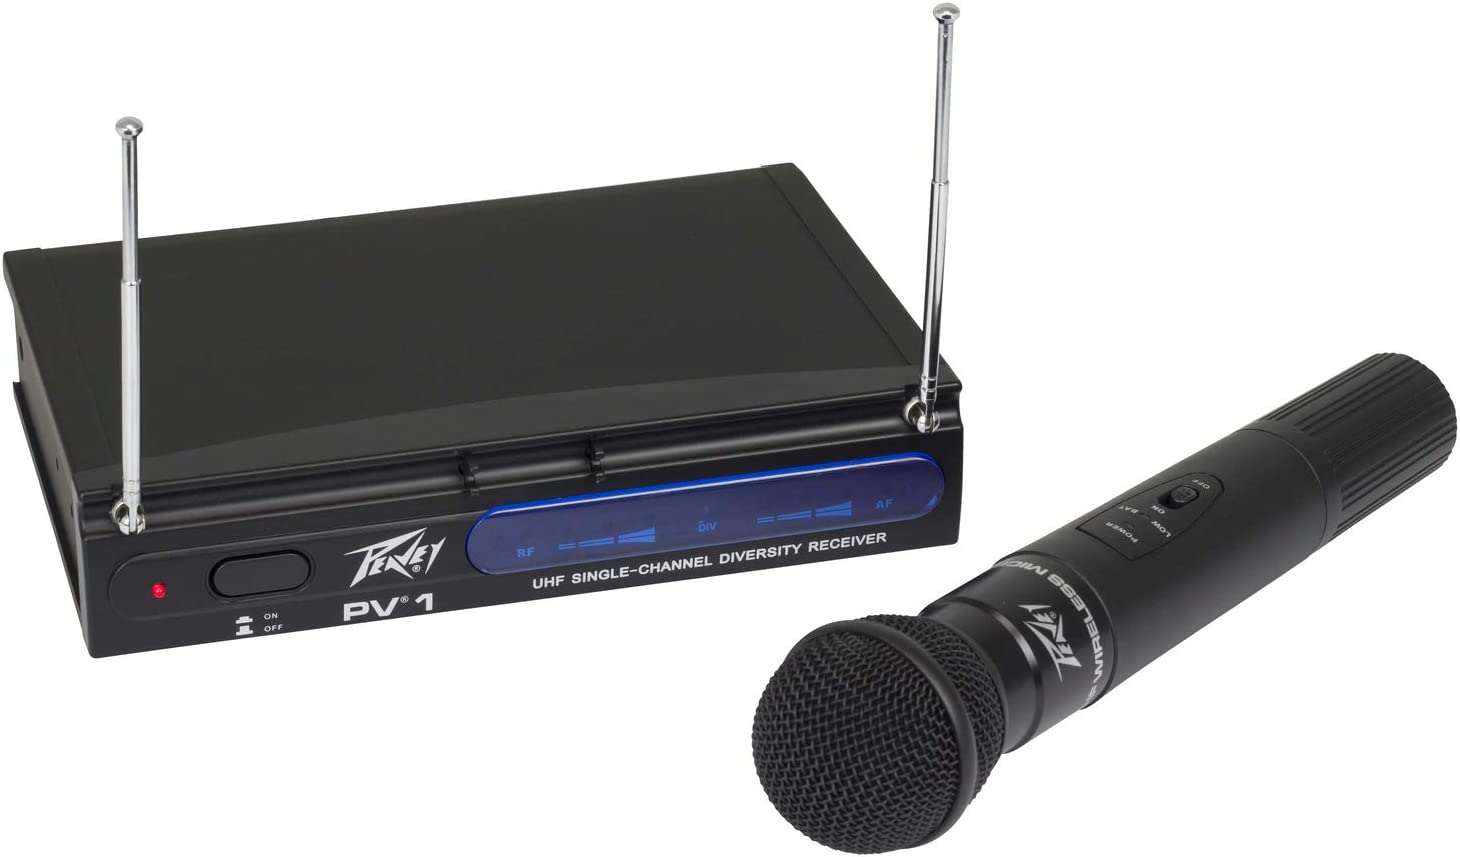
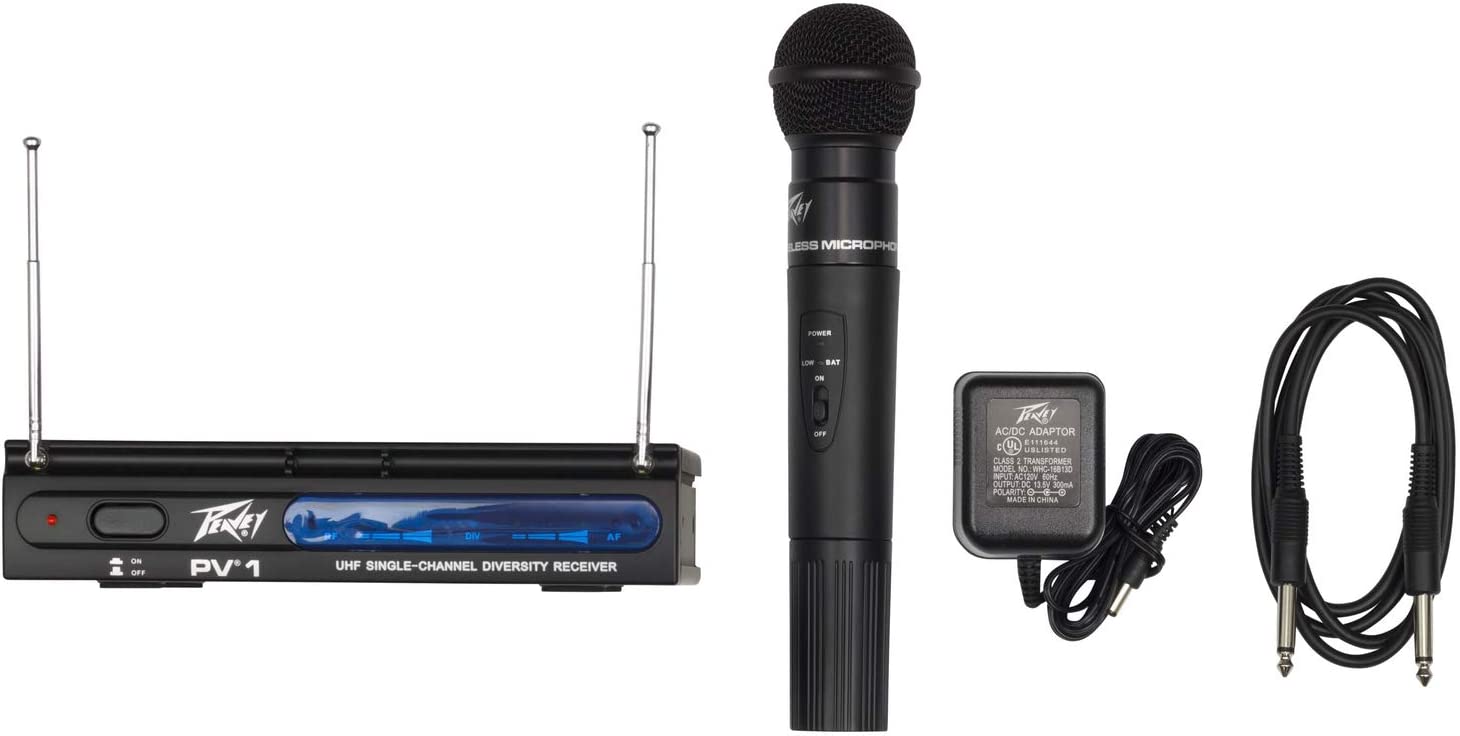
Système sans fil portatif UHF PV-1 U1 HH 911.700MHZ
PV-1 U1 HH 911.700MHZ
- Systèmes sans fil à diversité monocanal PV-1 dans les modèles portables, casques d’écoute ou cravates en trois fréquences
- Système de guitare sans fil disponible en deux fréquences
- UHF ou VHF
- Des kits de montage en rack en option sont disponibles pour un ou deux récepteurs côte à côte
- Poids non emballé: 3.75 lb (1.7 kg)
- Poids emballé: 3.75 lb (1.7 kg)
- Largeur Emballage: 11 « (27.94 cm)
- Hauteur emballé: 15 « (38.1 cm)
- Profondeur emballée: 2.75 « (6.985 cm)
INSTRUMENT CONNECTION
Insert an audio cord with a 1⁄4” mono phone plug in the AUX AUDIO OUTPUT JACK (9) on the rear panel of the receiver. Plug the other end of the cord into an amplifier, effects, or mixing board, Adjust the AUX VOLUME CONTROL (8) on the UHF receiver clockwise until the volume level is comfortable for your application. This setting is roughly equivalent to a direct instrument cord connection.
Microphone connection (using the transmitter with either a headset or lavalier microphone or the handheld microphone transmitter)
For Microphone use, either the BALANCED MIC AUDIO OUTPUT XLR (7) or the 1⁄4” line level AUX AUDIO OUTPUT (9) can be used. The XLR output is set at a nonadjustable microphone level, similar to wired mic levels. Plug an XLR connector into the XLR output connector on the rear of the unit and plug the other end into your amplifier or mixing board.
Make sure the volume is turned down when making connections. For your convenience, the XLR output level is preset at the factory and is not adjustable with the receiver volume control.
The receiver is equipped with an AF PEAK LED INDICATOR (3) which lights with a strong audio signal from the transmitter. Occasional flickering on loud inputs to the transmitter is normal. If the LED lights continuously, decrease the volume to the transmitter or overload distortion may result.
HANDHELD MICROPHONE
- Unscrew the BATTERY COMPARTMENT COVER (13) and remove, exposing the BATTERY HOLDER (14). Insert a fresh 9V ALKALINE BATTERY (15), observing the correct polarity as marked, and screw the cover back on to the microphone. Make sure the cover is screwed on completely. A fresh alkaline battery can last up to 10 hours in use, but in order to ensure optimum performance, it is recommended that you replace the battery after every 7-8 hours of use.
- Turn on the microphone by sliding the OFF/STANDBY/ON SWITCH (16) to the STANDBY position (transmitter on, audio muted) or the ON position (transmitter and audio both on). The BATTERY INDICATOR LED will give a single quick flash, indicating usable battery strength. In the case of a dead or low battery, the LED will either not illuminate at all or will stay on continuously, indicating that the battery should be replaced.6
3. The microphone is now ready to use. The A and/or B DIVERSITY LED INDICATORS (2) on the receiver should now be lit, indicating a received signal from the transmitter. When ready to speak, slide the transmitter switch to the ON position. Adjust the volume of the receiver as per the Audio Output Microphone Connection section of the above receiver instructions.
[Note: Observe care in selecting P.A. volume, transmitter location and speaker placement so that acoustic feedback will be avoided.]
*To preserve battery life, turn the transmitter off when not in use.
BODYPACK TRANSMITTER
- Slide open the hinged BATTERY COMPARTMENT (18) and insert (2) fresh AA ALKALINE BATTERIES (19), observing the correct polarity. Fresh alkaline batteries can last up to 10 hours in use, but in order to ensure optimum performance, it is recommended that the battery be replaced after 7-8 hours of use.
- The body pack is equipped with a 3.5mm LOCKING JACK (21) for connecting the audio input selected. Connect either the INSTRUMENT CORD (22) or the HEADSET MIC (23) or LAVALIER
MIC CORD (24) as desired. To secure the connection, insert locking mini-XLR into the jack. To unplug, reverse the process.
Slip the transmitter into a pocket or CLIP (28) it on to your clothes or instrument strap (if using it as an instrument transmitter). The CLIP can be rotated 90 degree if the transmitter is to be attached horizontally (instead of vertically) by loosening the screws holding the clip.
- Turn on the body pack transmitter by sliding the OFF/STANDBY/ON SWITCH (26) to the STANBY position (transmitter on, audio mute or the ON position (transmitter and audio both on). The BATTERY INDICATOR LED (25) will give a single quick flash, indicating usable battery strength.In the case of a dead or low battery, the LED either will not illuminate at all or will stay on continuously, indicating that the battery should be replaced. To preserve battery life, turn the transmitter off when not in use. The transmitter is now ready to use. The A and/or B DIVERSITY LED INDICATORS (2) on the receiver should now be lit, indicating a received signal from the transmitter.
- Instrument UsePlug the 1⁄4” phone plug from the INSTRUMENT CORD (22) into the instrument. As the cord to the instrument also serves as the antenna, be sure to extend if fully for maximum range. Rolling up or shortening the cord may reduce the effective operating range. When ready to play, slide the audio OFF/STANDBY/ON SWITCH (26) to the ON position. Adjust the volume of the receiver as per the audio Output Instrument Connections section of the above UHF receiver instructions.
(Note: Levels should be adjusted with the volume control of your instrument.)
The AF PEAK LED INDICTOR (3) on the UHF receiver will light for all loud input signals. Occasional flickering on and off during use is normal, however if the LED stays on continuously, turn down the instrument volume or noticeable distortion may result.
(Note: Scratchy noises can sometimes occur when some electric guitars with dirty pots or connections are used with any wireless system. Therefore, the supplied INSTRUMENT CORD (22) has a factory installed capacitor inside the 1⁄4” plug. This capacitor provides first order filtering of the RF signal from the cord into the guitar and eliminates virtually all scratchy noises. Should your equipment still give you scratchy noises, we suggest these steps to eliminate them:
- a) Make sure all guitar volume and tone pots are clean and all contacts are soldered, this is very important.
- b) A 47pf capacitor soldered across the hot to ground terminals of the guitar’s volume and tone pots will provide extra filtering.
- Microphone Use (with either a lavalier or headset microphone)
Secure the connection from the LAVALIER (24) or HEADSET MIC CORD (23), to secure theconnection, insert locking mini-XLR into the jack. To unplug, reverse the process.8
To use the lavalier mic, attach it at chest level or higher. Do not place it too close to the mouth – a distance of about six inches is recommended. To use the headset mic, place it on your head and adjust the boom so that the mic is about one inch to the side of the front of the mouth. As the microphone cord also serves as the antenna, be sure to extend it fully. Rolling up or shortening the cord may reduce the effective operating range – keep it as straight as possible.
When ready to speak, slide the OFF/STANDBY/ON SWITCH (26) to the ON position. Adjust the volume of the receiver as per the Audio Output Microphone Connection section of the above UHF receiver instructions.
[Note: Observe care in selecting P.A. volume, transmitter location and speaker placement so that acoustic feedback will be avoided. Unidirectional mics are more resistant to feedback, but pick up sound equally from all directions, and are prone to feedback if not used carefully. Unidirectional mics are more resistant to feedback, but pick up sound sources best that are directly in front of the mic. Also, mics that are farther from the sound source, such as lavaliers, require more acoustic gain and thus more prone to feedback than close-source mics such as handheld or headset models that are used close to the mouth.
The AF PEAK LED INDICTOR (3) on the UHF receiver will light for all loud input signals.







Avis
Il n’y a pas encore d’avis.